3. Contacts
Steps to Add a Contact:
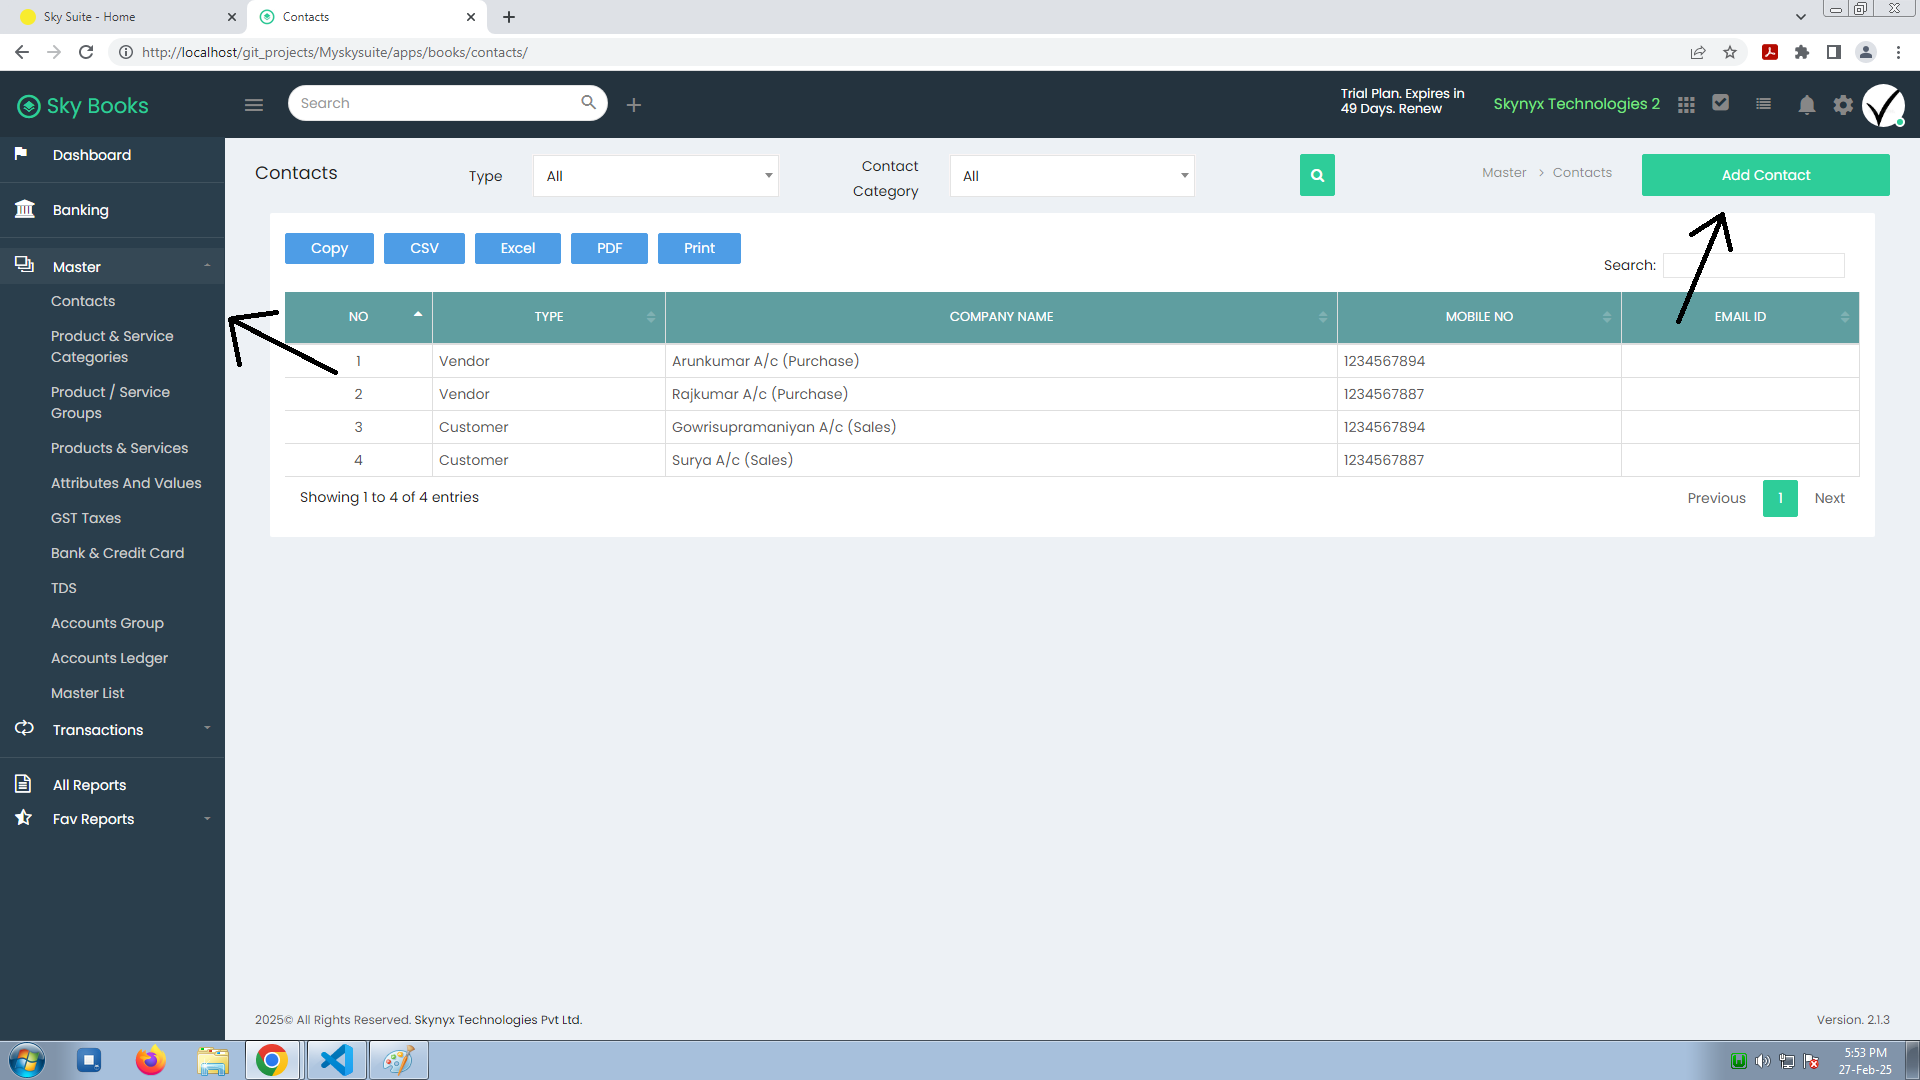
1. Navigate to the Add Contact Section:
- Go to your accounting or customer management system.
- Look for the option to Add Contact.
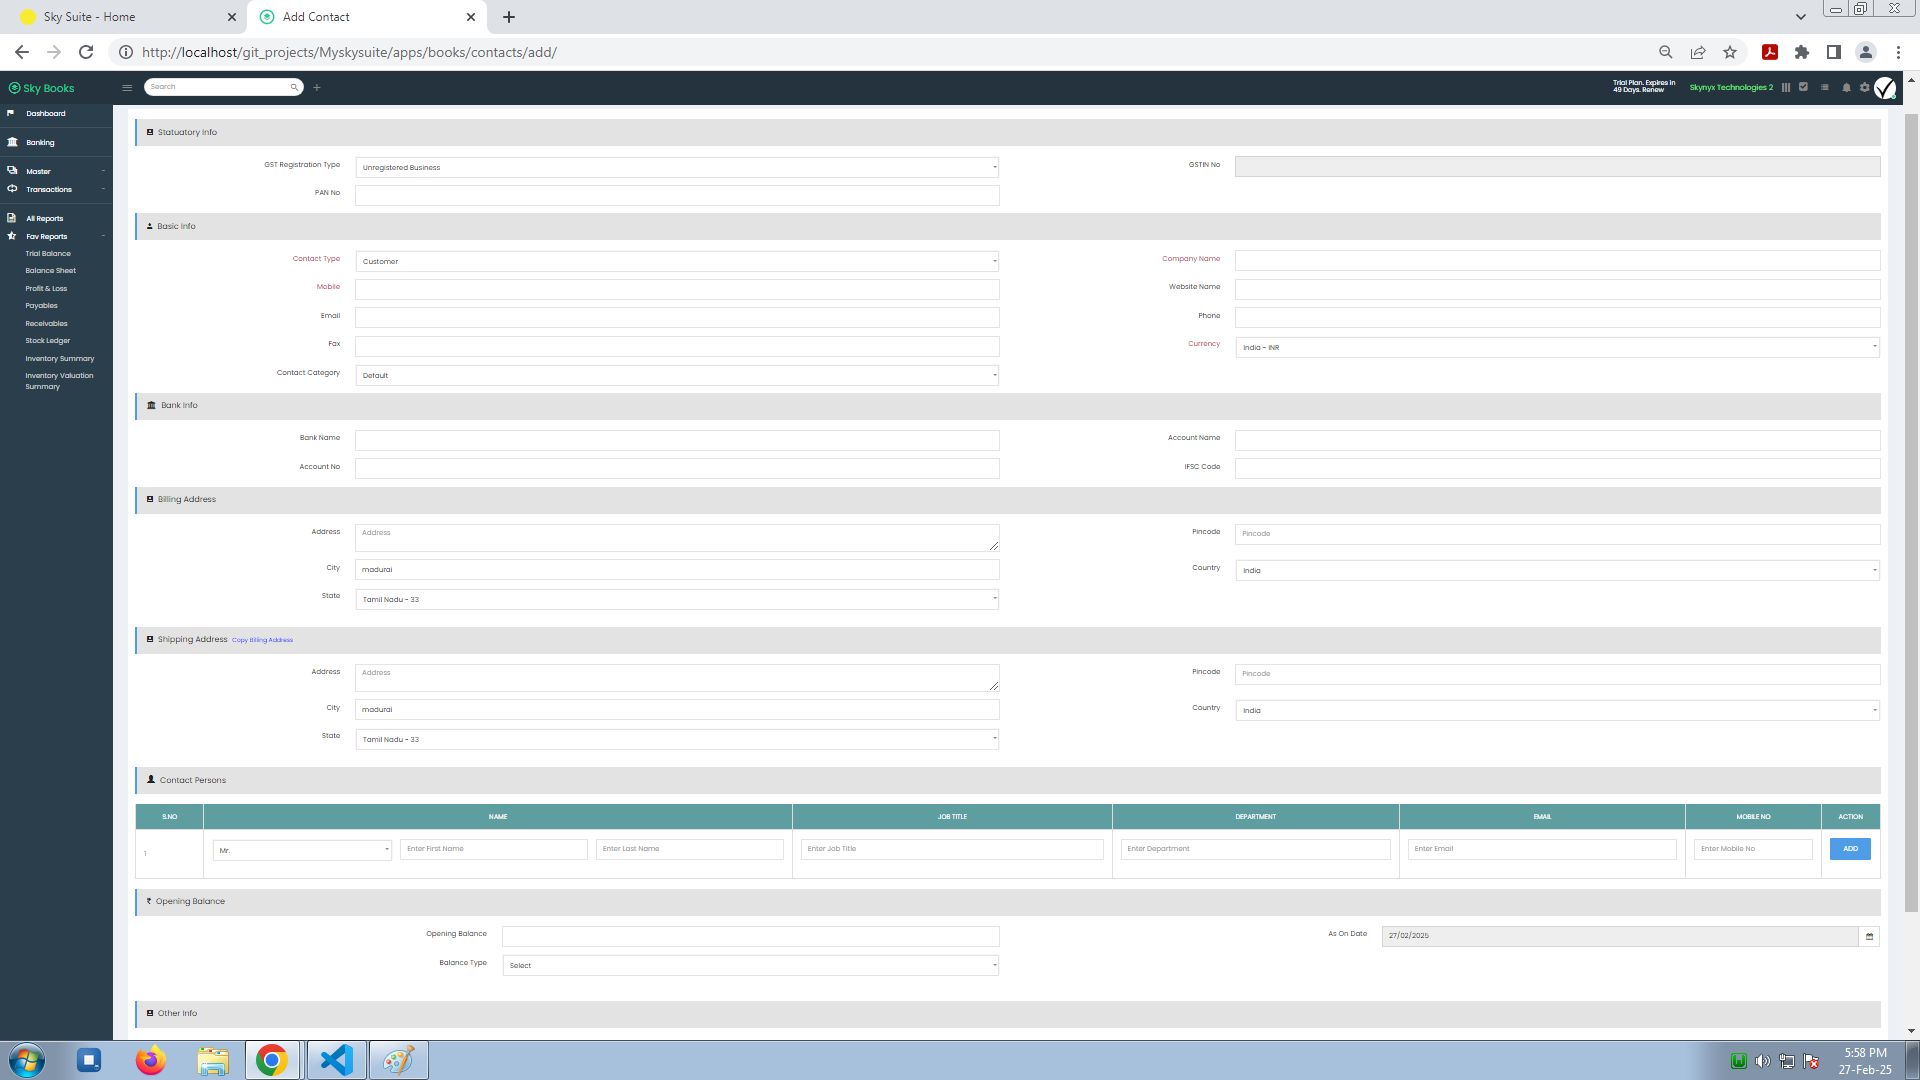
2. Statutory Info:
- GST Registration Type: Select the relevant GST registration type (e.g., Regular, Composition, etc.).
- GSTIN No: Enter the GST Identification Number.
- PAN No: Enter the Permanent Account Number (PAN) of the contact (if applicable).
3. Basic Info:
- Contact Type: Choose the type of contact (e.g., Supplier, Customer, Vendor, etc.).
- Company Name: Enter the name of the company if the contact is a business entity.
- Mobile: Enter the contact mobile number.
- Website Name: Enter the contact website, if applicable.
- Email: Enter the contact email address.
- Phone: Enter the contact phone number.
- Fax: Enter the contact fax number (if applicable).
- Currency: Select the currency used by this contact (e.g., INR, USD).
- Contact Category: Choose a category, such as Retail, Wholesale, Individual, etc.
4. Bank Info:
- Bank Name: Enter the name of the bank where the contact has an account.
- Account Name: Enter the name associated with the bank account.
- Account No: Enter the bank account number.
- IFSC Code: Enter the IFSC (Indian Financial System Code) of the bank branch.
5. Billing Address:
- Address: Enter the billing address.
- Pincode: Enter the billing pincode.
- City: Enter the city (e.g., Madurai).
- Country: Enter the country.
- State: Enter the state.
6. Shipping Address (Optional, if different from Billing Address):
- If the shipping address is the same as the billing address, you can copy the billing address.
- If not, enter the shipping address details as required:
- Address: Enter the shipping address.
- Pincode: Enter the shipping pincode.
- City: Enter the city.
- Country: Enter the country.
- State: Enter the state.
7. Contact Persons (Key Personnel):
You can enter the details of key individuals associated with the contact.
- S.No: Serial number for the list.
- Name: Enter the name of the contact person.
- Job Title: Enter the person job title (e.g., Manager, Director).
- Department: Enter the department (e.g., Sales, Accounts).
- Email: Enter the person email address.
- Mobile No: Enter the person mobile number.
- Action: You might have an option to add or edit contact persons.
8. Opening Balance:
- Opening Balance: Enter the opening balance for this contact (the initial amount owed or receivable, depending on whether the contact is a customer or supplier).
- Balance Type: Choose whether it is a Debit or Credit balance.
- As On Date: Enter the date of the opening balance (e.g., 27/02/2025).
9. Other Info:
- This Contact is Agent/Broker: If the contact is an agent or broker, check this option.
- Agent/Broker Names: Specify the names of agents/brokers associated with the contact (e.g., Arunkumar A/c (Purchase), Rajkumar A/c (Purchase), Gowrisupramaniyan A/c (Sales), Surya A/c (Sales)).